Before anyone panics, there's nothing to relearn after the upgrade. We've kept the steps the same as they've always been but added some helpful messages to the checkout screen as well as made it possible to see the Previous Customer Total and the Balance Due at the same time. It's still the same easy process you've been using - we've just added more information to help new users know what to do at each step along the way.
The first step in using Family Checkout is checking in all the customers that will be a part of the sale. You can do that from the appointment book by clicking on the appointment and clicking Check In on the following screen or by using the Check In menu button at the top of the screen. Make sure to check in all the customers that are paying together first.
Next, go to the Check Out menu button at the top of the screen. This comes up with a list of currently checked in customers which will include all the customers you just checked in. Click all the names that are checking out together - the program will highlight all the customers. Once you've selected at least two customers you'll notice that the bottom of the screen shows a new box - Customer Paying this Bill. Once you've selected all the customers for this ticket you can pick one of those customers from that list as the person that will pay for the bill. That customer will be the last one checked out and their total will show the total from all the other sales as well as their own. Once you've selected the customer paying the bill, click Continue to move on to the next step.

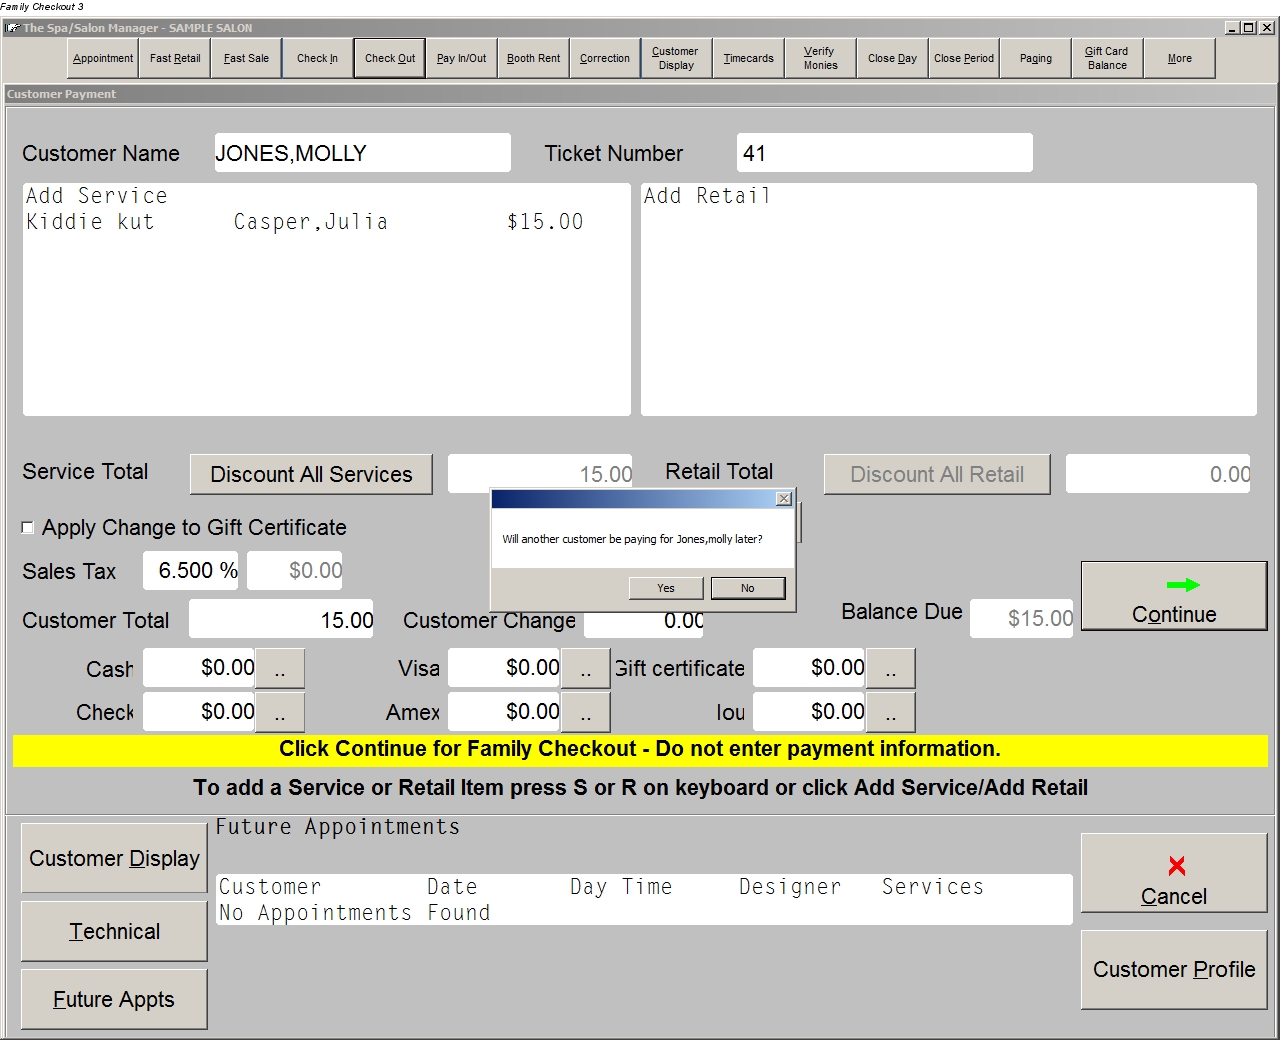
After this step, you'll have a typical checkout screen for the first customer. The only difference is a message that shows in yellow beneath the payment lines: "Click Continue for Family Checkout - Do not enter payment information". Fill in everything as you would normally - services, retail items, discount codes, etc. Once you have the correct information entered for that customer, hit Continue without entering a payment. The program will ask you if someone will be paying the bill later - answer Yes to this question. This will take you to the next customer - just repeat these steps for every customer until you get to the last customer - the one we selected earlier as paying the bill.

When you get to the last customer you'll see a new message in yellow beneath the payment lines: "Previous Customer Total: $XXX.XX". This message shows the amount that's carried forward from all the other customers. Fill in everything as you would normally again - services, retail items, discount codes, etc. You'll notice then that the Customer Total reflects the Service and Retail totals from this customer as well as the Previous Customer Total shown in yellow. At that point, enter the correct payment and click Continue. You're done with the Family Checkout!

On the bookkeeping end of things, all the customers that did not pay the bill will show up as paying with cash. The customer that paid the bill will show up as getting change in an amount that covers the rest of those sales. This reflects what actually happen - one customer paid over the amount for their bill, received change, and used that change to pay for other customers.
Family Checkout remains a powerful tool to speed up the checkout process for families, wedding parties, or any other type of group. Cloud customers already have the new features from Family Checkout and non-Cloud customers can do a Web Update to get the most recent version of the program. As always, please contact support with any questions.
No comments:
Post a Comment